This article will give you the basics to leverage H2o to create a neural net model in seconds and then show you how to consume that model all from Windows PowerShell. We’ll assume you do NOT know what H2o is nor do you know anything about machine learning other than it exists. It’s going to rely on the REST API as there is no module yet for H2o (HINT HINT – Great easy project if anyone wants to take it on).

But, machine learning is hard, isn’t it? Don’t I need high-level mathematics and a degree?
A few years ago I took the flagship Stanford course on machine learning from Coursera and have a basic understanding of how the different algorithms and implementations work. However, without day-to-day practice, the information slowly leaked from my brain. Historically, the barrier to entry to implement machine learning has been a bit too much. Even with libraries that implement the various algorithms, it simply required a ton of work to even get to the point where you could train a set of data. Tuning that usually required graduate-level understanding of each algorithm and the math behind it. If you’ve toyed in this space without getting serious, then you probably have a similar story. All of that changed for me when starting to play with the python library SKLearn (won’t be discussing today) and the cross-platform open environment for analytics/machine learning called H2o.
Full disclosure, there is still some art to tweaking the algorithms and data to get an optimal data model, H2o makes it much easier. For now, don’t’ worry about that. I promise you’ll have a deep learning neural net training a data model in only a few minutes.
What is H2o?

You can read all about it on their website, but in my mind, H2o is an open platform to easily train data models, tweak them, and finally put them into production. It comes with a set of libraries for python, java, and R, it has a REST API (which we will leverage today), and it even has a GUI if you want to stay out of code entirely. Personally, I find the web GUI great, but use it mostly for examining data I’ve loaded or to quickly do something when I don’t feel like looking up the API/lib call. When using it with PowerShell it becomes essential because the mapping of the API is directly against what you can do with Flow.
Isn’t Machine Learning All About Big Data?
No! People have lost their minds when it comes to data. Just because people have lots of data doesn’t mean you need that data. Depending on the number of columns or properties your data has and how efficient you are storing data in your data sets (ideally, just the numbers), you can fit 5k rows on only ~200k of disk space. A million rows is about 40 MB. As long as you can fit your data set in a single server’s memory, you are outside of the realm of big data. Whoever is telling you otherwise, is trying to sell you something. Don’t get me wrong, you can run machine learning against large data sets, but most problems are not big data problems.
The Iris Data
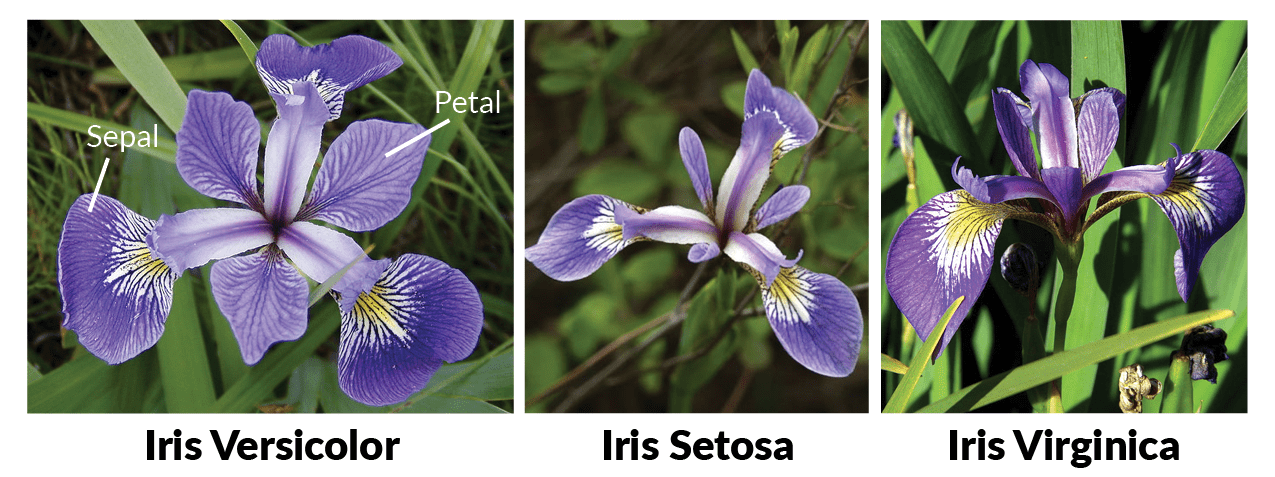
Today, we will be using one of the most famous sets of open data, the Iris data. You can read about the data and its properties here, but at a high level, there is a bunch of data about flower dimensions (pedal length/width & Sepal length/width) and a classification of 3 types of Iris species. The goal is to use the data to create a model to predict the species of Iris based on the dimensions as input.
Quick start H2o
H2o is a complete running service that you will need to start on your computer with Java.
-
- Download java (if you don’t have it already)
- Download H2o and extract the h2o-version folder directly into c:\h2o
- Run H2o in PowerShell:
Java.exe -jar c:\h2o\h2o.jar
Alternatively, this will work as a background job if you want to keep everything in a single process:
Start-job -scriptblock {java.exe -jar c:\h2o\h2o.jar}
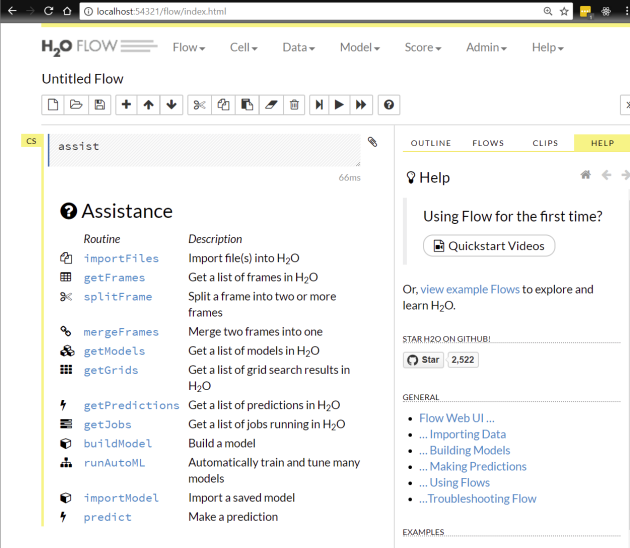
You can now browse to http://localhost:54321 to open the H2o Flow interface:
Step 1 Prep the Data
Prepping the data will proceed as follows:
- Import the Data
- Parse the Data
- Split the Data into Train and Test data
Import the Data
The API call for this is pretty straightforward. It allows you to pass a file path or URL to the ImportFiles function.
$url = "http://localhost:54321/3/{0}"
$iris_url = 'https://raw.githubusercontent.com/DarrenCook/h2o/bk/datasets/iris_wheader.csv'

"Import the IRIS data"
$importfiles_url = $url -f "ImportFiles"
$importfiles_body = "path=$iris_url"
$ret = Invoke-RestMethod $importfiles_url -Method POST -Body $importfiles_body
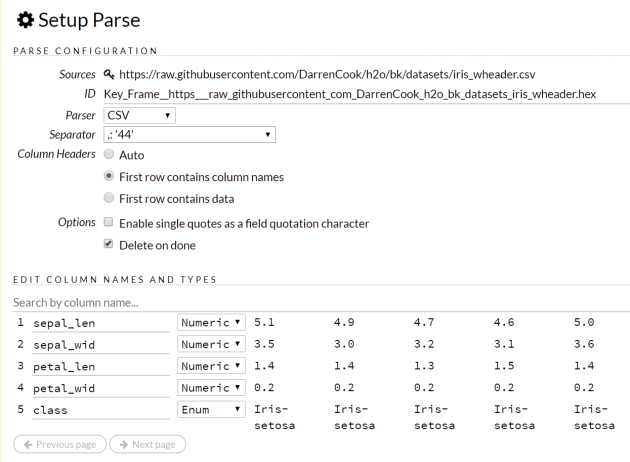
Parse the Data
This step is about having H2o interpret the data format and load it into a native H2o Data Frame. Oddly, this step is the most complex to navigate in the API even though with all of the defaults H2o does a perfect job of parsing the data. The challenge is that you must first call a function to autodetect the Parse settings, and then use the output from that function to the Parse function. This brings us to the biggest issue with the API as it lives today in v3. The challenge is that the Post data does not accept JSON, but all of the return data from API is JSON. The team promises to introduce JSON data natively in the near future, but until then you must post data in key/value form as specified by application/x-www-form-urlencoded. Unfortunately, there are no native libraries to do this Marshaling between data types so I wrote a quick helper function to do a single-level of parsing for you:
function ConvertTo-FormData {
	param(
		  [Parameter(ValueFromPipeline=$true)] [PSObject] $InputObject
		 )
	Begin {
		$output = ""
	}
	Process {
		foreach ($prop in $InputObject.psobject.properties |select -expandproperty name) {
			if ($InputObject.($prop).gettype().name -eq "Boolean") {
				if ($InputObject.($prop)) {
					$output += "$prop=true&"
				} else {
					$output += "$prop=false&"
				}
			} if ($InputObject.($prop).gettype().isarray) {
				# hacky for h2o collections
				if ($InputObject.($prop).name) {
					$output += "$prop=[{0}]&" -f ($InputObject.($prop).name -join ",")
				} else {
					$output += "$prop=[{0}]&" -f ($InputObject.($prop) -join ",")
				}
			}
			else {
				$output += "$prop=" + $InputObject.($prop) + "&"
			}
		}
	}
	End {
		$output.Remove($output.Length-1,1)
	}
}
With this function in hand, calling ParseSetup and Parse is very straightforward once you know the parameters. The parameters for any command can usually be figured out by a combination of looking at the input schema in the documentation (located inside of Flow under “Help”) and by trying to use the widgets in flow to see what the parameters the function is going to need:
And here it is in PowerShell code:
"Run parse setup to find out how H2o thinks it should parse the data"
$parsesetup_url = $url -f "ParseSetup"
$parsesetup_body = 'source_frames=[{0}]' -f $iris_url
$ret = Invoke-RestMethod $parsesetup_url -Method Post -Body $parsesetup_body

"Parse the data into a real H2o dataframe"
$parse_url = $url -f "Parse"
$parse_body = $ret | select source_frames,parse_type,separator,number_columns,single_quotes,column_names,column_types,check_header,chunk_size |ConvertTo-FormData
$parse_body += "&destination_frame=iris&delete_on_done=true"
$ret = Invoke-RestMethod $parse_url -Method Post -Body $parse_body
In the above, the destination_frame is the name of the data as it will now live on H2o. Once the data is imported, you can see what it looks like in H2o Flow with this common name.
Async Polling
Some of the functions are run asynchronously. The Parse function is one of those. When H2o does something in this manner, it will provide you with a job id that you may poll. Unfortunately there are no callbacks available or web sockets to tap into. Here’s a helper function to do the polling:
function Wait-H2oJob {
	param(
		  [Parameter(Mandatory=$true, Position=0)]
		  [String] $JobPath
	)
	$notdone = $true
	while ($notdone) {
		$status = invoke-restmethod ("http://localhost:54321" + $JobPath) |select -ExpandProperty jobs |select -ExpandProperty status
		$status
		if ($status -eq "DONE") {
			$notdone = $false
		} else {
			sleep -Milliseconds 500
		}
	}
}
Finally, with this function in hand, you can see when the Parse function is done with the following:
wait-H2oJob $ret.key.URL
Caveat: the job key does not always return in exactly the same properties. You’ll see this in the future async calls we are about to make.
Split the Data
Even though there are only 150 rows in the dataset, we’re going to split the data so that we can train against a portion of the data and validate how well the model works against the other portion of the data. The following code will put 90% of the data into a new data frame named “train” and 10% of the data into a data frame named “test”:
"Split the data into an 90% training set and a 10% testing set"
$splitframe_url = $url -f "SplitFrame"
$splitframe_body = "dataset=iris&ratios=[.90,.1]&destination_frames=[train,test]"
$ret = invoke-restmethod $splitframe_url -Method Post -Body $splitframe_body
wait-H2oJob $ret.key.URL
Step 2 – Build the Model
It may not look like much, but this is all you need to implement a machine learning neural net in H2o:
$deeplearning_url = $url -f "ModelBuilders/deeplearning"
$deeplearning_body = 'training_frame=train&response_column=class&model_id=neural'
$ret = invoke-restmethod $deeplearning_url -Method Post -Body $deeplearning_body
wait-H2oJob $ret.job.key.URL
In the above, we are saying to use the data set named “train” and that we will be using the data in the columns to predict the column named “class”. Finally, we’ll be naming this data model “neural” to make it easy to access and view in H2o Flow.
Step 3 – Use the Model to Predict Against the Test Data
Finally, we’ll call the Predictions function against the Test data. We’ll then look at the MSE or mean squared error to see how well the model fits the additional data. The lower this number, the better.
$predict_url = $url -f "Predictions/models/neural/frames/test"
$ret = invoke-restmethod $predict_url -method POST -Body "predictions_frame=predicted_test_data"
$ret.model_metrics |select -expandproperty MSE
The output would look like this. The lower the MSE, the better the model is performing. Later when truly exploring the power of H2o, you will use this value to help you understand how well models are doing (and how poorly you may be overfitting your model to your data).
0.14980011539780046
Step 4 – Use the model for new data
Basically, by repeating the steps above of importing new data, you may predict against this data using the data model that now lives in H2o that we created named “neural”:
"Load something you want to predict"
@"
sepal_len, sepal_wid, petal_len, petal_wid
5.1,3.5,1.4,0.15
"@ |out-file -encoding ASCII c:\h2o\predict.csv
$importfiles_url = $url -f "ImportFiles"
$importfiles_body = "path=c:\h2o\predict.csv"
$ret = Invoke-RestMethod $importfiles_url -Method POST -Body $importfiles_body

"Run parse setup to find out how H2o thinks it should parse the data"
$parsesetup_url = $url -f "ParseSetup"
$parsesetup_body = 'source_frames=[{0}]' -f $ret.destination_frames[0]
$ret = Invoke-RestMethod $parsesetup_url -Method Post -Body $parsesetup_body

"Parse the data into a real H2o dataframe"
$parse_url = $url -f "Parse"
$parse_body = $ret | select source_frames,parse_type,separator,number_columns,single_quotes,column_names,column_types,check_header,chunk_size |ConvertTo-FormData
$parse_body += "&destination_frame=predictme&delete_on_done=true"
$ret = Invoke-RestMethod $parse_url -Method Post -Body $parse_body
Wait-H2oJob $ret.job.key.URL

"Let's leverage the data model we built earlier to predict against this new data frame"
$predict_url = $url -f "Predictions/models/neural/frames/predictme"
$ret = invoke-restmethod $predict_url -method POST -Body "predictions_frame=predictme_results"
Forunately, H2o also gives you access to the raw data so that you can inspect the results of the prediction. The following will spit out the data in the data frame named predictme_results where we are storing the prediction results:
$results_url = $url -f "Frames/predictme_results"
$ret = invoke-restmethod $results_url
$ret.frames.columns |select label, data
The output of the above looks something like the following.
label           data
-----           ----
predict         {0.0}
Iris-setosa     {0.9999987226382198}
Iris-versicolor {1.2773201404672E-06}
Iris-virginica  {4.16397577662733E-11}
This means that with 99.99999% accuracy, the model believes that the values given would make this Iris belong to the species of Iris-setosa. That’s some serious confidence that we have identified our flower!

The Code Completely
All of the above code is available in a single script along with the MIT license for you to reuse every bit of it as you see fit.
What’s next? Learn H2o!
Learn H2o – The best book I’ve played with is the O’Reilly book, “Practical Machine Learning with H2o“. All of the code is in Python, but it’s more important to learn the interfaces and the details of the various parameters available with each available algorithm in H2o. As a PowerShell developer, you should be able to follow along. If you can’t, it may be time to learn a little python too – it may be a substandard language to PowerShell, but it is leaps and bounds ahead of PowerShell in terms of ecosystem and libraries – it also has great visual code editing tooling with Jupyter and Zeppelin if you want to start getting serious with machine learning or analytics.
Just as important will be attempting to use H2o via Flow a little more. The API is completely reflected by the way that Flow works. Additionally, Flow’s help section has links to the API to learn the interfaces as well as the input/output schemas as you need to do more with H2o and PowerShell.
What’s next? Grid Searches & AutoMLBuilder!
The best things to look at while reading about H2o are grid searches to do parameter tuning of data models and the AutoMLBuilder which will try all of the algorithms and do parameter tuning automatically for you. However, both of these are more interesting when you get to Sparkling Water.
What’s Next? Sparkling Water!
Spark was originally designed to pull in large sets of data from Hadoop into a distributed cluster of servers all in memory. This sped up the processing you could do with Hadoop data. Sparkling water is the library that connects H2o to Spark. It also lets you run H2o on a Spark cluster. If you want to take the technique learned in this article to a distributed platform with thousands of cores churning, sparkling water does this for you without any additional work. It’s especially effective when trying to find optimal parameters for the algorithm arguments. This is generally very compute intensive due to the nature of how grid searches and the AutoMLBuilder are basically brute force attempts to find optimal sets of parameters. They naturally parallelize very nicely.
What’s Next? Productionize a Model Without Keeping H2o Running
Finally, H2o is a great tool for building models, but after the model is built you probably want something a little lower in weight. The answer is to download the pojo/mojo. In an upcoming non-powershell post, I’ll share my techniques for using the pojos outside of H2o to create very fast REST services with a GUI that can be called and scaled as needed.